
If you are looking for a new roof that will protect your property from the elements, you might be thinking about installing a corrugated metal roof. Rainwater is a problem for most homeowners, especially in places where water accumulates on the roof and pounding on it. But installing corrugated metal roofing sheets is not a simple task as you might think, even when it comes to slopes. In this article, we’ll walk you through the process of installing corrugated metal roofing sheets on a slope to ensure efficient rainwater runoff.
Table of Contents
What is a Corrugated Metal Roofing Sheet?
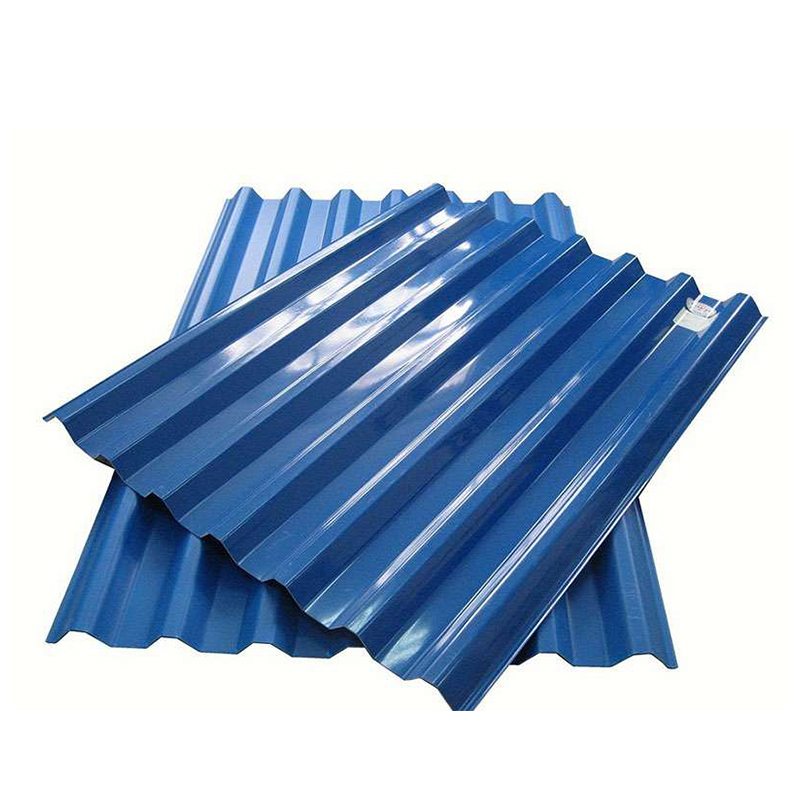
Photo by alibaba.com
A corrugated metal roofing sheet is a type of roofing that is made up of many small, thin sheets that are tightly woven together. This type of roofing is most commonly used on flat roofs, but can also be used on slopes.
How to Install Corrugated Metal Roofing Sheets on a Slope:

If you are installing corrugated metal roofing sheets, there are a few things you need to keep in mind. First, make sure the slope is level. Second, make sure the sheets are installed in a direction that will avoid rain and snow from collecting on them. Third, make sure the sheets are secured to the roof with screws or nails. Finally, make sure the seams between the sheets are sealed with sealant.
Installation of a sloping roof
If you have a slope on your roof, it may be time to install corrugated metal roofing sheets. This type of roofing is designed to handle the extra stress and strain that a slope puts on it. Here’s how to install corrugated metal roofing sheets on a slope:
1. Begin by measuring the slope of your roof and determining the amount of pitch you need. This can be done with a simple survey or by using a digital inclinometer.
2. Next, find the size of corrugated metal sheeting that will fit the area and match the pitch of your roof. You’ll need to account for any trimming or cutting that needs to be done in order to fit the sheeting.
3. Securely fasten the sheeting to your roof using galvanized screws and washers. Use caution not to cause any damage to your roof while installing the sheeting.
4. Once the sheeting is securely fastened, use a tarp or other covering to protect it from weather damage while it’s installed.
How to install sheet
If you have a sloped roof, it is important to install a metal roofing sheet correctly in order to avoid water damage and protect your home from the elements. Follow these steps to install a corrugated metal roofing sheet on a slope:
1. Determine the slope of your roof. A 1/4-inch rise per 100 feet of length is standard for flat roofs, but more for steep roofs.
2. Inspect the roof for any existing leaks or damaged areas. Repair or replace any faulty flashing, gutter, or shingles.
3. Mark the elevation of the lower edge of your metal roofing sheet using a straightedge and level. Allow a 2-foot overhang at the bottom for installation hardware and insulation.
4. Cut your metal roofing sheet to size using a circular saw with a kerf guide and miter gauge. Make sure the sheet is at least 2 inches wider than the slope of your roof and 3 inches taller than the overhang you marked down in Step 3.
5. Install your metal roofing sheet by securing it to the joists with galvanized screws every 16 inches along the length of your sheet
Types of Corrugated Metal Roofing Sheets
There are three types of corrugated metal roofing sheets: flat, pitched, and inverted. Flat roofing sheets are the most common and are used on roofs with a gentle slope. Pitched roofing sheets have a U-shaped cross-section and are used on roofs with a more severe slope. Inverted roofing sheets have an inverted V-shaped cross-section and are used on roofs with a very steep slope.
To install corrugated metal roofing sheets on a slope, first, determine the slope of the roof. Then, find the roughness of the roof surface using a level. Measure the distance from the edge of one sheet to the edge of another sheet and multiply that number by 0.6 to find the number of inches per foot of the slope. This number is also called the Nominal Sheet Width (NSW). Next, find the NSW of each sheet and subtract 1 inch from that number to get the Actual Sheet Width (ASW). Finally, measure each sheet’s ASW and cut them to that size.
Flat Roofing Sheets: To install flat roofing sheets on a slope, first measure the distance from one edge of one sheet to another edge of the next sheet. Measure the distance from the edge of one sheet to the edge of one end of another sheet, and multiply that number by 0.75 to find the Nominal Sheet Width (NSW). Next, find the NSW of each sheet and subtract 1 inch from that number to get the Actual Sheet Width (ASW). Do this for all sheets on a roof.
How to install metal roofing sheets with shingles
If you are installing corrugated metal roofing on a slope, it is important to follow the manufacturer’s instructions carefully. Failure to do so could lead to serious damage to your home and equipment.
Here are a few tips for installing corrugated metal roofing sheets on a slope:
1. Make sure that you have enough material to work with. The sheets should be at least twice as wide as the distance from the edge of the roof to the nearest shingle.
2. Pre-mark the location of each shingle with a pencil or piece of paper before starting installation. This will make it much easier to locate and replace them during construction.
3. Install the first sheet of metal along the bottom edge of the roof, overlapping it by at least 2 inches (5 cm). Secure it in place with screws or nails set at least 1 inch (2.5 cm) below the surface.
4. Install the next sheet of metal, overlapping it again 2 inches (5 cm). Again, secure it in place with screws or nails set 1 inch (2.5 cm) below the surface. Continue this process until all of the sheet metal is installed. Make sure that no shingles are visible from the inside of the house when viewing from the front, side, and rear. If any are, remove them and replace them with more shingles.